1. To get started we should first update the Raspberry Pi to ensure we are running the latest software.

sudo apt update
sudo apt upgrade

2. Install CUPS and these packages by typing the following command into the terminal on your Raspberry Pi.

sudo apt install cups printer-driver-gutenprint printer-driver-brlaser hplip samba 

3. Add User and grant public access

sudo usermod -a -G lpadmin $USER
sudo cupsctl --remote-any
sudo systemctl restart cups

4. Once you have your Raspberry Pi’s IP Address, go to the following web address in your favorite web browser.

http://x.x.x.x:631

#Allow port 631 (if require)
sudo ufw allow 631

5. Setting up SAMBA for the Pi Print Server

sudo apt install samba
sudo nano /etc/samba/smb.conf

6. Now with the file open, we will need to scroll to the bottom of the file.

# CUPS printing.
[printers]
comment = All Printers
browseable = no
path = /var/spool/samba
printable = yes
guest ok = yes
read only = yes
create mask = 0700

# Windows clients look for this share name as a source of downloadable
# printer drivers
[print$]
comment = Printer Drivers
path = /var/lib/samba/printers
browseable = yes
read only = no
guest ok = no

7. We can now restart SAMBA to get it to load in our new configuration.

sudo systemctl restart smbd

8. Adding a printer to CUPS

GOTO: https://x.x.x.x:631

On here we need to click “Administration” in the navigation menu at the top of the screen.
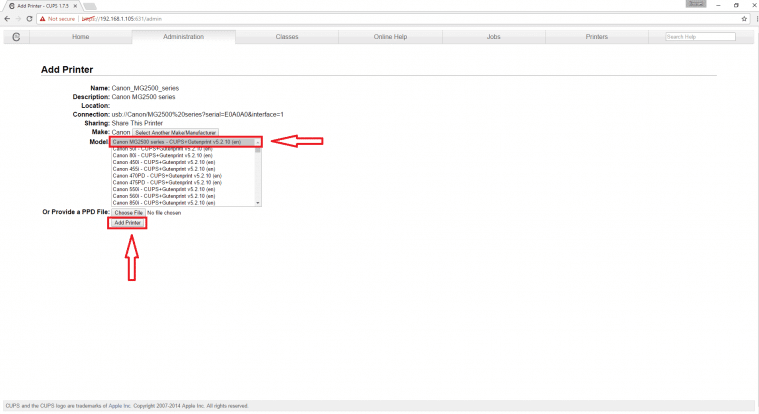
On here, we need to click on the “Add Printer” button.

Then set printer Model
cups select model

9. Find and Add Printer from Windows

10. Setup for MAC user

sudo apt install avahi-daemon
sudo systemctl restart avahi-daemon
sudo systemctl enable avahi-daemon

#Allow port 5353 (if require)
sudo ufw allow 5353